
How to turn an intraoral scan into a print-ready model for aligner thermoforming with Model Prep.
- What it does
- Before you start
- Step by step
- Adjusting the trim line
- Settings
- The articulator hinge
- What it costs
- Common questions
What it does
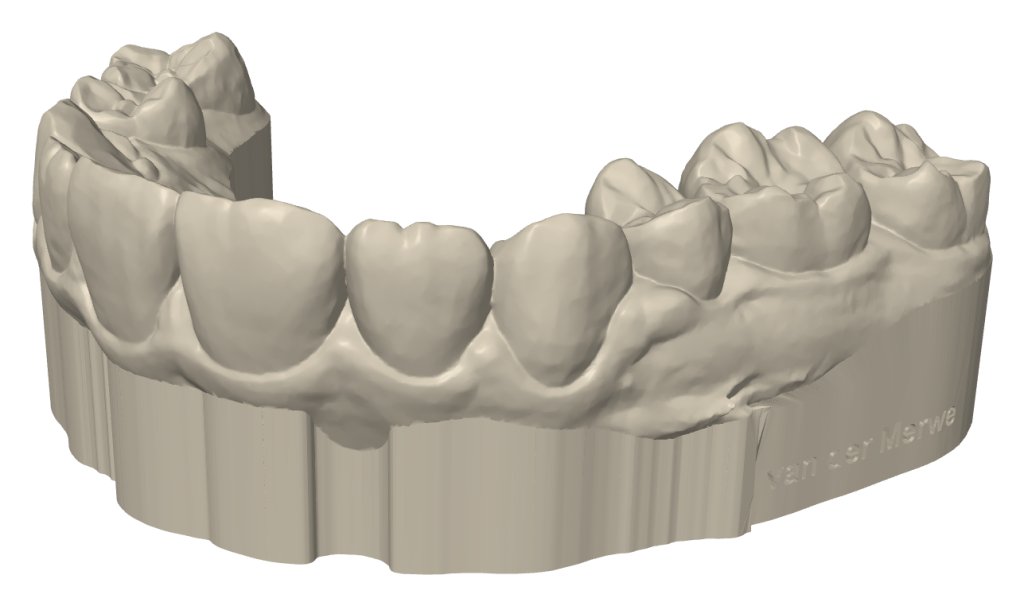
Model Prep takes the upper and lower STL files from your intraoral scanner and turns each into a model you can print: levelled on the bite, trimmed along the gum line, on a smooth base, with the patient’s name engraved into the side. You check the result in 3D, adjust the trim line if you want to, and download a print-ready STL for your 3D printer.
Before you start
- An approved practice account. Model Prep is for registered dental practices: log in, or register and wait for your account to be approved.
- The terms, once. The first time, Model Prep shows a short summary, Before you start, with a box to tick. It comes back only when the terms change.
- Your scans as STL files: the upper and the lower jaw, as your scanner exports them. For the articulator hinge, both scans must be exported in the bite (most scanners do this).
- A computer with a current browser: Chrome, Edge, Firefox or Safari. Model Prep works in the browser and needs 3D graphics (WebGL 2); a desktop or laptop is easiest.
Your patient’s privacy. Everything happens in your browser. Your scans and the patient’s name stay on your computer; nothing is uploaded to us. The site only keeps your credits and, for each download, the time, the jaw and an export code.
Step by step
- Add the scans. Under 1. Scans, drop both STL files on the box, or click it to choose them. Model Prep reads the file names to tell the upper from the lower. If it got them the wrong way round, press Swap upper and lower.
- Type the patient’s name under 2. Patient name, as you want it engraved: up to 25 characters (letters, numbers, spaces, hyphens and apostrophes; accents are left off). Each word starts with a capital. The name goes on the side of the base, on the patient’s right unless you change it.
- Check the settings under 3. Settings (see Settings below). Model Prep remembers them for next time.
- Press Prepare models. It takes a few seconds. Preparing is free and you can do it as often as you like.
- Check each model in the preview. Choose Upper, Lower or Both (the two together in the bite), and Scan, Model, Trim line or Cross-section. Drag to turn, scroll to zoom, right-drag to move, double-click to reset the view.
- Adjust the trim line if you need to (see Adjusting the trim line). Once models exist, a change to a setting or the name prepares the out-of-date models again by itself.
- Download. Each model card has a Download button; Download both takes the pair. Check every model before you print it: the right patient and arch, and the name spelt correctly.
Adjusting the trim line
Model Prep draws the trim line just above the gum edge of the scan. Open the Trim line view to change it:
- Move the line: drag a dot up or down. The line changes smoothly, and only between that dot’s neighbours. The cheek side and the tongue side move separately.
- Finer control: click on the line to add a dot, as many as you like. A dot you add and leave alone holds the line in place. Double-click an added dot to remove it.
- Redraw a stretch: press Redraw a stretch, click its two end dots, click the spots the new line should pass through, and finish on the open end dot.
- Start again: Reset trim line. When you are happy, press Click to recalculate models on the preview.
Dots stay on the scan’s surface and stop at its edge. Moving the line up onto the teeth is allowed, with a warning.
Settings
| Setting | Choices | Default | What it changes |
|---|---|---|---|
| Wall thickness | 2.0 – 3.5 mm | 2.5 mm | How thick the walls of the hollow model are. |
| Base height | 2 – 10 mm | 6 mm | The height of the smooth band under the gum line. Below 4 mm there may not be room for the name. |
| Base | Open, hollow shell · Closed, drain holes · Closed, solid | Open, hollow shell | Open saves the most resin. Closed with drain holes lets resin drain from inside; solid uses the most resin. |
| Drain holes, Drain hole size | 1 – 4 holes, 2 – 4 mm | 2 holes, 3 mm | Only for Closed, drain holes. |
| Resin price | your price per litre | empty | Shows what each model costs to print (the model only, not supports or spillage). Remembered for next time. |
| Name on the patient’s (Advanced) | right · left | right | Which side of the base the name is engraved on. |
| Articulator hinge (Advanced) | No hinge · Snap hinge, standard fit · Snap hinge, loose fit | No hinge | A snap joint at the back of both models (see The articulator hinge). |
| Teeth kept solid, from the top (Advanced) | 6 – 12 mm | 9 mm | How far down from the tips of the teeth the model is solid before it becomes a hollow shell. |
The articulator hinge
With Snap hinge chosen under Advanced, Model Prep adds a ball-and-socket joint at the back of the upper and lower models, printed with them. After printing, the two clip together in the bite and open and close. Standard fit suits most printers; choose loose fit if the joint is too tight on yours.
The hinge needs both scans, exported in the bite. If it cannot be added, the model card says why and the models are made without it.
What it costs
- Free: adding scans, preparing, checking and adjusting, as often as you like.
- One credit per downloaded model. While the page stays open, downloading the same model again is free (Download again). A model that changed (a setting, the name or the trim line) is a new model.
- Or a subscription, for unlimited downloads. It can be cancelled any time and runs to the end of the paid month.
- Credits do not expire and are not refundable. Buy them in the block under the tool or in My Account → Model Prep. Prices are on the Pricing page.
Common questions
The page says my browser cannot show 3D.
Model Prep needs WebGL 2. Use a current version of Chrome, Edge, Firefox or Safari on a computer, and make sure the browser’s hardware acceleration is switched on.
The upper and lower are the wrong way round.
Press Swap upper and lower under 1. Scans, then Prepare models again.
The name is missing from the base.
A low base may leave no room for it. Choose a Base height of 4 mm or more and prepare again. The model card says when the name was left off.
The model card says the hinge was left off.
The hinge needs both scans, exported in the bite. Add the missing scan, or export the pair again from your scanner in occlusion.
Do I pay again if I download the same model twice?
Not while the page stays open: the button reads Download again and costs nothing. After you close the page, or once the model has changed, a download uses a new credit.
More help
Watch the Video training, use the Help us improve Model Prep box under the tool to report a problem or suggest something (you can add a picture or screenshot to show what you mean), or contact us.